We buy lots of cookware, to the point where we had to figure out new ways to store it. This How To article will show you the things we considered and tried. Ultimately we went with wire shelves with pan organizers sitting on those shelves, in addition to giving away excess pans to family and friends (including readers of this site–for more information, subscribe to our monthly updates via social media or email). But there are other methods that work, too, if you have fewer pieces of cookware to store.
COUNTERTOP/SHELFTOP/PANTRY/CABINET PAN ORGANIZERS
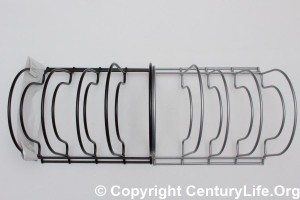
The basic unit of countertop/shelftop/pantry/cabinet organization is the pan organizer. Our main workhorse pan organizer is the Rubbermaid Pan Organizer Rack, which comes in black or titanium color (“titanium” is just their term for a paint color; both racks are made out of painted steel). The welds are decent, and there are two slots for bigger/thicker pans and two slots for smaller/thinner pans. The wires are thin enough that you can bend them to be slightly angled if necessary. You can also mount it vertically, and the Rubbermaid pan organizer comes with mounting screws for that purpose. Features include:
- Supports up to 2.23 pounds of weight per pan
- Fits up to two 14″ pans and three 9″ pans; stores them sideways
- Easy to install with adhesive or screws; mounting hardware are included in the package
- The dimensions if you lay it on its side (so pans are vertical) are: 11 inches long, 10 inches deep, and 9.5 inches tall (for the bigger slots).
- Each slot is slightly more than 2.5 inches wide; this is the actual width not including wires.
- Protects pans from scratching each other
- Comes with nonskid/adhesive patch if you decide to mount it vertically, to prevent the organizer from sliding around too easily.
- Can be used to store lids as well
- It’s the same thing no matter what color you buy it in; “titanium” just refers to the outer coating color, not the material
- Microban (an unnecessary antimicrobial coating that pollutes the environment and does not even keep you safer from germs)
A company called Grayline used to produce a comparable product as Rubbermaid but apparently exited the market. We’d recommend that brand as well.
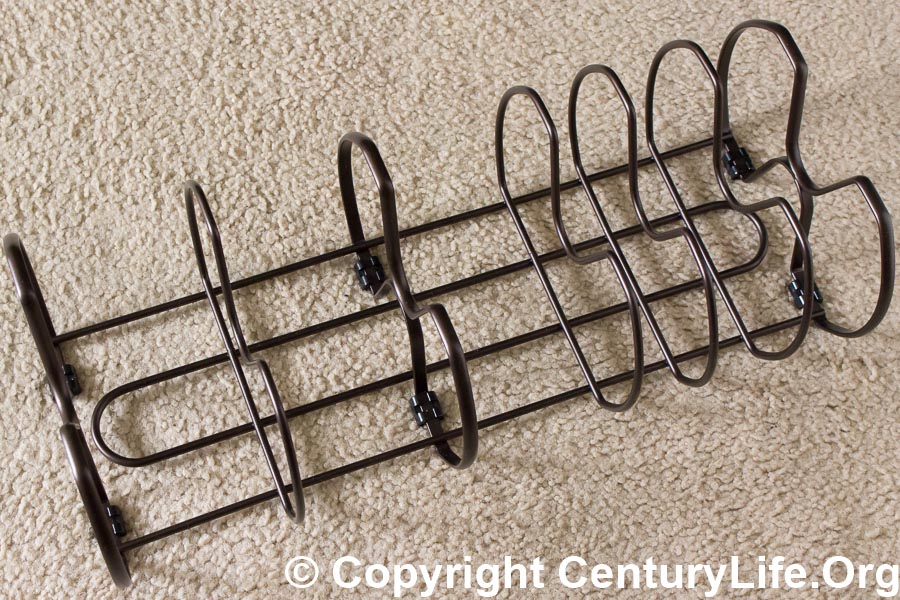
If you need to store saute pans, we can can recommend the DecoBros Kitchen Cabinet and Pantry Organizer Rack, 6 Compartments (pictured below), which is 17.25 inches long and 8 inches wide. The large compartments are spaced about 3.5 inches apart and are 4.5 inches high. The small compartments are spaced about 1.5 inches apart and are also 4.5 inches high. All of the vertical wires are bent down in the middle to make room for lid handles/knobs. The DecoBros’s three large compartments are mainly good for saute pans: they are too wide for many frying pans (which tend to lean over at an angle, and the low divider walls don’t help prop them up), and yet too thin for most sauce pans. The three small compartments are okay for lids/cutting boards.

We’ve used other alternatives to the Rubbermaid besides the Grayline and DecoBros, but none that we’d recommend. The Seville Classics 4-Tier Pan Organizer Rack has decent welding and chrome jobs to prevent breaking and rusting, respectively, but it’s not any cheaper than a Grayline. We also use the Seville Classics Kitchen Pantry and Cabinet Organizer
as a lid holder, since it can’t hold anything more than the smallest of frying pans. Its elder sibling, the Seville Classics 2-Tier Corner Shelf Counter and Cabinet Organizer, Platinum
, is poorly welded and has little rubber feet that fall off because they use poor glue. Seville’s stainless steel cart/island (which I reviewed here) is pretty good, so I’m surprised that they did such a sloppy job on their pan racks.
In addition to pan/pot racks, I would highly recommend getting a pantry organizer set, so you don’t have to dig through stuff to find what you need. They are particularly important for freezers that don’t come with racks of their own.
ROLLING ISLANDS AND CARTS
Speaking of rolling islands and carts, that’s another storage option. The downside is that they take up more space than some people have available in their kitchens, and they also tend to cost hundreds of dollars if they are any good–just check out the Amazon best-selling Kitchen Islands/Carts. We decided to go for the more affordable, industrial Seville stainless steel cart instead. If you go for a wood-top, get as many inches as you can reasonably afford; two inches should be the absolute minimum. The thicker the wood, the less likely it is to bend/warp over time.
WALL MOUNTED RACKS
Another solution is to use wall-mounted pot racks, which usually come with a small shelf as well as a bunch of S-hooks
. (For example, the Range Kleen CW6009 Stainless Steel Pot Rack Bookshelf, 12 by 36 by 10-Inch
holds up to 30 pounds and has a small top area for pots, pans, spices, or whatever else you want to put on there. Note that S-hooks vary in sizes and shapes. I like asymmetric S-hooks with one hairpin curve and one larger curve, because they are more secure. The ones I got for my wire rack were the Range Kleen 6-Pack C48 Pot Rack Accessory Hooks, Chrome
.)
What to look for:
- Cheap shelving is made out of steel with paint or plating; that works well for a long time, but over the years the paint/plating can wear off. If you want greater durability, get a stainless steel rack such as the aforementioned Range Kleen CW6009
which is among the cheapest ones available but which isn’t built too thin/flimsy.
- Make sure you drill into actual wood and not drywall. Stud finders
are cheap but effective; get one if you don’t have one already.
- Also consider getting a wall or door mounted lid rack
to complement the wall-mounted pot/pan rack. Alternatively, if you have shelf/counter/pantry space, you could use a chrome-plated steel
or bamboo
lid rack, instead.
CEILING-MOUNTED RACKS
A ceiling-mounted pot/pan rack is another solution. These are amazing if you want to show off your cookware, though less-amazing if you have dirty or scuffed-up cookware. Hanging racks have their own problems, though. Such hanging racks are potentially dangerous if installed incorrectly, and some pots/pans don’t have holes for hanging, to say nothing of things like kitchen appliances or spice jars. Some people also dislike hanging racks because pieces can bang into each other, chipping or scratching each other, unless you spread out the hooks a bit. So this is a decent solution for a limited number of cookware pieces, and it doesn’t really take up a lot of space if you place it out of the way of kitchen traffic.
What to look for in hanging pot racks:
- Weight limit. Heavy cookware like cast iron will quickly eat up a weight limit. A 12-inch cast iron pan may weigh 8 pounds all by itself, for example. (In contrast, a 12-inch All-Clad Stainless pan weighs 2.79 pounds.)
- Number of hooks. Most hanging pan/pot racks have only 8 to 12 hooks, which might not be enough for a large cookware collection. You’ll either have to get a larger pan/pot rack or store some of your collection elsewhere.
- Spacing of hooks. Generally speaking you don’t want pans/pots to bang into each other. That can causes unwanted scratching and lots of noise.
- Material. Most cheap hanging pot racks
are made out of regular steel, sometimes coated with paint, chrome plating, or some other protective substance to resist rust. If it says wrought iron it probably means painted steel, because real wrought iron is expensive (and unnecessary from a functional point of view; only get it if you like the styling). Although paint/plating can last for quite a long time, over the years they can wear off/chip off. If you want greater durability, get a rack made out of stainless steel
, which naturally resists rust and has no paint/plating that can wear off.
- If you live in an earthquake-prone area, you might have second thoughts about hanging tens of pounds of cookware from the ceiling. To minimize that downside, look for racks that have multiple attachment points to distribute the weight rather than concentrate weight on a single point of failure.
- Consider getting a wall or door mounted lid rack
to complement the hanging pan/pot rack. Alternatively, if you have shelf/counter/pantry space, you could use a chrome-plated steel
or bamboo
lid rack, instead.
- If you misplace some hooks, or if you think you can squeeze another hook onto the rack, you can buy after-market S-hooks. (Note that S-hooks vary in sizes and shapes. I like asymmetric S-hooks with one hairpin curve and one larger curve, because they are more secure. The ones I got for my wire shelves were the Range Kleen 6-Pack C48 Pot Rack Accessory Hooks, Chrome
.)
WIRE SHELVING (STEEL WIRE RACKS) FOR STORAGE
We have a lot of cookware and appliances to store, so we resorted to what many commercial kitchens and warehouses use: steel wire racks. Wire racks vary greatly in quality, though.
What to look for in shelving:
- If you’re going to use the shelf in a wet environment, try to get shelving that is certified by the National Sanitation Foundation (NSF). Certification means it’s approved for use in commercial kitchens. If a company is too cheap to pay to get NSF approval, think about what other corners they cut? That does not mean non-NSF shelving can’t be used, but I would not be surprised if they were more prone to rust, because the chrome plating was thinner or poorly applied. Among NSF-certified brands, I’ve used and can vouch for the good quality of Seville
and Trinity
.
- Finish
- Chromium is very hard and durable though if you bang into it with something hard enough times, the chromium plating can come off and expose the underlying steel. Chrome plating is safe. (Cadmium is an unsafe heavy metal that sometimes gets confused with chromium because they both start with a “c.”) Chromium does not rust.
- Stainless Steel is unusual for wire shelving, but obviously the most rugged since there is no protective coating that can wear off to expose the non-stainless steel underneath. Stainless steel is naturally rust-resistant because iron is mixed with a high (14%+) percentage of chromium. This is the safest wire shelving material and is made out of the same material that lines stainless steel cookware.
- Zinc Plating is a cheaper substitute for chrome plating, but not quite as durable though still pretty good, and like chrome, zinc does not rust. Sometimes there is a chromate topcoat placed on top of the zinc plating to improve durability and looks.
- Epoxy Powder Coating is a cheap, thin coating of what is basically paint. Bang into it enough times and it will flake off and expose the underlying steel, which can rust. Epoxy paints can also degrade from exposure to sunlight and condensation, which causes the paint to disintegrate or “chalk out.”
- Liners
- Some shelving come with plastic shelving liners
made out of nontoxic polypropylene plastic. Ordinarily dust/debris/water/etc. can fall through the gaps between wires, but they can’t penetrate plastic liners. In my experience, plastic liners are unnecessary for larger kitchenware. If you’re worried about things like water dripping onto bare cast iron, then maybe you could use a plastic liner. Or you could just place your cast iron higher on the shelf. We use liners but only in our shelving outside of the kitchen.
- Note that liners come in only a few sizes, so if they matter to you, try to get shelving that is the same size. Else you will have to cut them down yourself. Some popular sizes are 48 x 18 inch shelf liners and 36 x 14 inch shelf liners.
- Some shelving come with plastic shelving liners
- Guards/Railing
- Some wire shelves come with some variety of railing to help ensure that items don’t fall off the back of the shelf. That’s probably not necessary for larger objects like pans, or for things that you put into boxes or other large containers that are unlikely to be pushed off.
- Casters
- Casters are wheels that are mounted to swivel joints so that the wheel can turn any direction (like a shopping cart’s front wheels). If it’s important to be able to move the shelf after installation, e.g., to more easily clean underneath, then you want to mount the shelf on casters.
- Any decent caster set should have at least two wheel locks. These locks prevent the wheel from turning when engaged. That’s important in case of earthquakes or other unwanted movement.
- Casters are four inches in most good shelving, but three-inch casters exist. The bigger casters tend to have a higher weight limit.
- Non-caster rubber feet.
- Most good shelving will have rubber or plastic inserts for the shelving in case you don’t use casters. Without casters, the shelving weight limit is much higher since casters are more fragile.
- Be aware that if you buy a shelf with the intention to break it into two or more shorter shelves, the manufacturer may not have included enough spare rubber/plastic shoes to cover all of those mini-shelves. For example, if you separate a four-tier shelf into two half-shelves, one of those half-shelves might be barefoot. In that case, you can improvise by using a shim like a piece of cardboard if necessary. Or you can just go barefoot, though that may damage soft flooring if you load the shelf up with heavy objects.
- Maximum weight per shelf.
- Weight is assumed to be evenly-distributed across the entire shelf. For typical cookware and kitchen appliances, that’s not a terrible assumption. But if you have a particularly heavy piece of machinery, try to situate near the ends and not the middle of the shelf, in order to minimize sagging.
- Maximum weight overall. This assumes even weight distribution and is the maximum weight of the entire shelving unit, not just the maximum weight for one shelf tier.
As for shelf sizing, that depends on a variety of factors:
- What is the largest pan/pot/whatever that you need to store on the shelf? This determines the minimum depth of the shelf. I would recommend 18-inch wide shelving if you want to store larger (11+ inch diameter) pans. That gives the pans’ handles something to sit on, rather than drooping down. Wider shelves are also more useful for storing larger kitchen appliances like food dehydrators, microwaves, etc.
- Cheaper shelves
skimp on depth and are often only 14 inches deep instead of the more-common 18 inches. The wires may be thinner as well. Generally speaking, those shelves deliver fewer square inches of shelving space per dollar. Still, if you don’t need or want a larger unit, it may be worthwhile to buy a smaller shelving unit. If you want the larger shelving units, you can find the good stuff locally at a warehouse store or perhaps some hardware stores. Be warned that the good, big shelves tend to be very heavy and bulky, so you may have a hard time fitting it into most vehicles (I know I did!). I’d recommend a pickup truck, van, or large SUV, otherwise don’t bother and just order it online instead of giving yourself a hernia jamming an awkwardly-shaped 80-pound box into a car.
- If you want to use plastic shelving liners
, you want to make sure they will fit your shelf or else you will have to cut them down to size yourself.
- Cheaper shelves
- How much floorspace do you want to take up?
- Shelving is like a skyscraper: it gives you more capacity using the same footprint as a smaller building. A six-tier wire shelf essentially gives you six times more floorspace than its footprint. That said, you still need to measure out where you’re going to put a shelf, before installing it. Note that most 4+ tier shelving is 72 inches tall without casters, and more including the casters. (This also means that if you get 2+ shelves, you should get the same brand so that they are the same height.)
- How many tiers of shelving you need is a personal decision.
- You can buy additional shelving, but the cost is usually very high. Therefore it’s less risky to buy more tiers than you think you’ll need and to store the spare tiers. For a kitchen I would recommend six tiers with no hesitation because some items can be very flat (e.g., pans, boxes of food), so you will likely find some use for each tier of shelving.
- If you’re putting a shelf together, you have a lot of flexibility as far as how big you want each tier to be. I like the lower tiers to be big and gradually shrink them till I get to the top.
If you live in an earthquake-prone part of the country, you may want to install Furniture retaining straps, which are what we use. They wrap around and securely fasten the shelving to nearby walls. Make sure you drill into actual wood and not drywall. Stud finders
are cheap but effective; get one if you don’t have one already.
Lastly, a cheap and effective way to give yourself even more storage is to use S-hooks around the edges of the shelf. (Note that S-hooks vary in sizes and shapes. I like asymmetric S-hooks with one hairpin curve and one larger curve, because they are more secure. The ones I got for my wire shelves were the Range Kleen 6-Pack C48 Pot Rack Accessory Hooks, Chrome.)
Example of unusually wide shelf (24 inch depth; NSF certified), 4-inch casters:
Example of thicker shelves (18 inch depth; all NSF-certified), 4-inch casters (for the ones that have casters):
Examples of thicker shelves (18 inch depth; all NSF-certified), 3-inch casters (for the ones that have casters; can’t hold as much weight due to the smaller casters but should suffice for non-commercial/residential use):
Example of thinner shelves (14 inch depth; note the Amazonbasics models are not NSF-certified, unlike the others):
Accessories (Liners, straps, S-hooks, lid racks, and pan racks):
PEG BOARDS
If you don’t mind your kitchen looking like a tool shed, you could use a pegboard, but since you are likely to move/remove pans and hooks more often than tools in the garage, I’d recommend getting a stainless steel pegboard for greater durability than you’d get with regular pegboards, which are made out of hardboard (basically high-density particle board). Don’t get an off-size pegboard, because traditional peg board hooks are designed for 1/4-inch thickness, so if you use a thinner pegboard the hooks will tend to droop.
What to look for:
- Avoid galvanized steel like the Wall Control 30-P-3232GV Galvanized Steel Pegboard Pack
. Galvanized steel has a thin layer of zinc to protect against rust, but since a kitchen peg board would get a lot more friction and banging than a garage pegboard used for tools/hardware, eventually you’ll scratch through the zinc and the pegboard starts to rust due to kitchen moisture or wet pots/pans or both.
- Do get a stainless peg board such as the USA-made, properly-sized (1/4-inch) Stainless Supply Stainless Steel Pegboard (Various Sizes Available; See Drop Down Menu) – Selected Size: (32″x48″ – 430)
. As for grade of stainless, if you want something that will definitely last for a lifetime, get 304 stainless (aka 18/8 or 18/10 stainless). If you need to trim costs, get 430 stainless which is okay–but don’t let water sit on 430 for a long time if you can help it. 430 stainless is also magnetic unlike 304 stainless, if that matters to you. For more information about stainless steel grades see this article) peg board.
- There are tons of zinc-coated pegboard hooks on the market
, and it may be more economic to get those and replace them if they start to rust, than to buy stainless steel pegboard hooks, which are more expensive
even if you buy them in a set
. You can swap out rusty pegboard hooks way more easily than you can a rusty pegboard.


